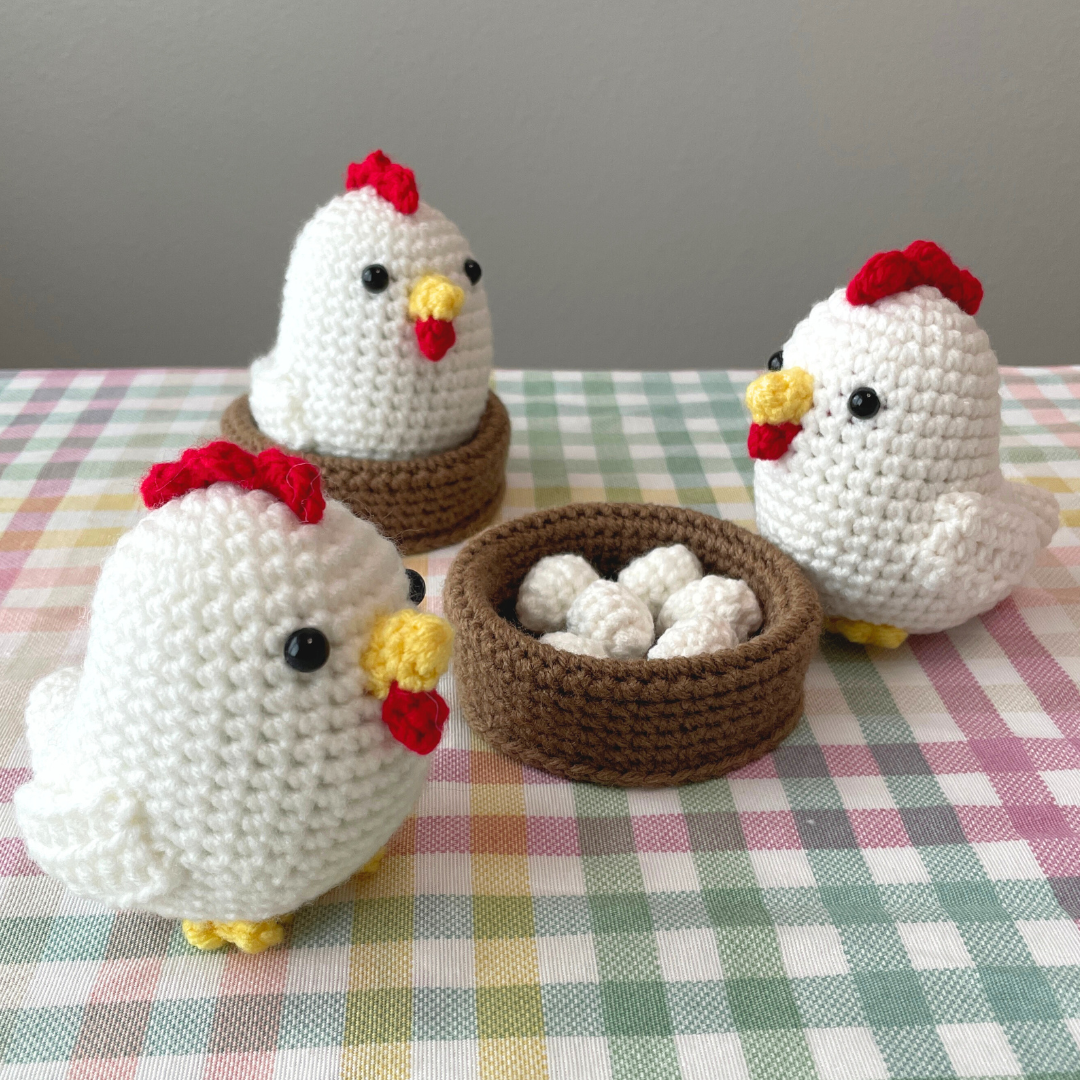
This chicken was the last commission I took, and I had a lot of fun with it-my customer was someone who raises chickens and I asked her all sorts of questions about chickens! Like what does a chicken’s ear lobe look like? How do you care for them in extreme hot or extreme cold? And I learned that the red part on top of a chicken’s head is called a comb and the fleshy flaps next to the beak are called wattles!
The chicken is made by crocheting the body first. Then, we'll crochet the comb, beak, wattle, wings, and feet and sew them to the body.
Personally, I feel very strongly about sharing the joy that I get from crocheting with you–which is why I make all my patterns free and into video tutorials. This is the free version of my Chicken pattern and the video tutorial will show you step-by-step how to crochet it! In addition to this free version, I am selling a paid version of the pattern. It is an 7 page PDF that has step-by-step pictures along with the patterns for the nest and eggs! I’d really appreciate it if you supported my work by purchasing the PDF of this pattern.
Materials
About 20g size 4 worsted weight yarn in white
About 2g size 4 worsted weight yarn in red
About 2g size 4 worsted weight yarn in yellow
8mm safety eyes
4mm crochet hook
Yarn needle
Stitch marker
Scissors
Stuffing
You can pick up all of these items at your local craft store, or you can check out my Amazon Storefront–if you make a purchase, I do earn a commission.
Abbreviations
MR = Magic Ring
ch = Chain
sc = Single Crochet
hdc = Half Double Crochet
inc = Increase (2 sc in 1 st)
dec = (Invisible) Decrease
st = Stitch
sl st = Slip Stitch
FLO = Front Loops Only
BLO = Back Loops Only
Body:
R1: 6sc in MR (6)
R2: 6inc (12)
R3: (1sc, inc)x6 (18)
R4: (2sc, inc)x6 (24)
R5: (3sc, inc)x6 (30)
R6-10: 1sc in each st (30)
R11: In 1st st, (1sc, ch 7, in the 2nd ch from hook, 6sc, 1sc), 29sc (43)
R12: 6sc, 2inc, 35sc (45)
R13-14: 1sc in each st (45)
R15: 6sc, dec, 1sc, dec, 9sc, dec, 10sc, dec, 9sc, dec (40)
R16: 1sc in each st (40)
Pause to attach eyes between R7-8, leaving 5sts in between
R17: 4sc, dec, 2sc, dec, 13sc, dec, 4sc, dec, 9sc (36)
R18: 1sc in each st (36)
R19: (4sc, dec)x6 (30)
R20: 1sc in each st (30)
R21: (3sc, dec)x6 (24)
R22: (2sc, dec)x6 (18)
Pause to stuff body.
R23: (1sc, dec)x6 (12)
R24: 6dec (6)
Fasten off, weaving in the tail.
Beak:
In yellow,
R1: 6sc in MR (6)
R2: 1sc in each st (6)
Sl st to fasten off. Leave a tail for sewing.
Wattle:
In red,
R1: 4sc in MR (4)
Work 2 additional sc. Sl st to fasten off. Leave a tail for sewing.
Comb:
In red,
Ch 7. In 2nd ch from hook [(sc, hdc, sc), slst into next ch] x3
Fasten off, leaving a tail for sewing.
Feet (Make 2):
Ch3, in 2nd ch from hook, slst 2, ch 3, in 2nd ch from hook, slst 2, ch 3, in 2nd ch from hook, slst 2. Slst back into 1st chain. Fasten off, leaving a tail for sewing.
Wings (Make 2):
R1: Ch 6. Starting in 3rd ch from hook, 4hdc, ch 4, turn.
R2: Starting in 3ch from hook, hdc in each of the next 2 chs, 4hdc, ch 2, turn.
R3: 6hdc, ch 2, slst to bottom of last st. Fasten off, leaving a tail for sewing.
Sew beak to body, placing it in between the eyes.
Sew wattle to beak.
Sew comb to body, placing it on top of the head between rows 1-4.
Sew wings to either side of the body, placing each wing between rows 13-18.
Sew feet to body, placing each foot between rows 21-23.
I'd love to see pictures of your completed Chicken! Tag @mary.merrymakes and use the #merrymakes to share off your creation with me! Please feel free to keep, gift, and sell your creations-all I ask is that you credit me @mary.merrymakes with the design. If you enjoyed this pattern and video tutorial, please consider supporting my work by buying me a coffee!